| Build your own webpage for free!
In this tutorial we will focus on building your own webpage using the tools offered by Angelfire. Angelfire can host different types of content such as web pages, photo albums or blogs and can be used as yet another tool for promoting your Video Chat on the web and gaining 55% commission on the traffic you bring in. We recommend that before creating your web pages you read the Angelfire Terms and Conditions. |
- Opening an Angelfire Account
 Angelfire offers several different packages, however in this tutorial we will be discussing the free package. more…
 - Getting Started
 Since this tutorial is focusing on building your own web pages more…
 - Angelfire WebShell
 Angelfire provides you with a simple tool that enables you to organize the pages you wish to create more…
 - Section 1 – File Management
 This is your main work area. Here you will be able to organize your files, create new pages for your website more…
 - Section 2 – File Upload
 To make your webpage more enticing, you will want to upload images of yourself. more…
 - Section 3 – Transloader area
 The Transloader is a tool that lets you copy content from anywhere else in the Web directly into your Angelfire member directory. more…
 - Building & Editing your Webpage
 As mentioned earlier, the index.html file is the main page of your website. more…
 - Use your most flattering photo as your main image
- Don´t forget to add your Referral Link
- Add a Live Console to inform potential clients if you are online.
- Adding a Live Console to your Webpage
 Angelfire enables you to add HTML to the free text block in the Basic Editor. more…
 - Adding More Pages to Your Website
 In order to include a Photo Gallery on your site, you will need to add a new page to your website. more…
 - Adding Links
 You have several places where you can add links in your Angelfire website. more…
 - Promoting your Website
 Once you have created your website, you should ensure that people find it on the internet. more…
 - Let´s Summarize:
- Angelfire provides you with tools for building your own webpage.
- Open an Angelfire account and choose your username and password. Your username will also act as the ending of your website’s URL.
- Choose to build your website with Angelfire WebShell.
- Upload images of yourself using the File Upload feature.
- Start building your webpage by editing the index.html file.
- Upload your most flattering photo and use it as your main image.
- Include your Referral Link to earn 55% commissions from the traffic that enters your Video Chat through your Angelfire website.
- Include your Live Console to inform your potential clients if you are currently online.
- Add a photo gallery to your website to make it more attractive and interesting. Don´t forget to add a link on your main page that leads to the photo gallery page.
- Promote your webpage by including strong keywords in your website and following the additional tips provided by Angelfire.
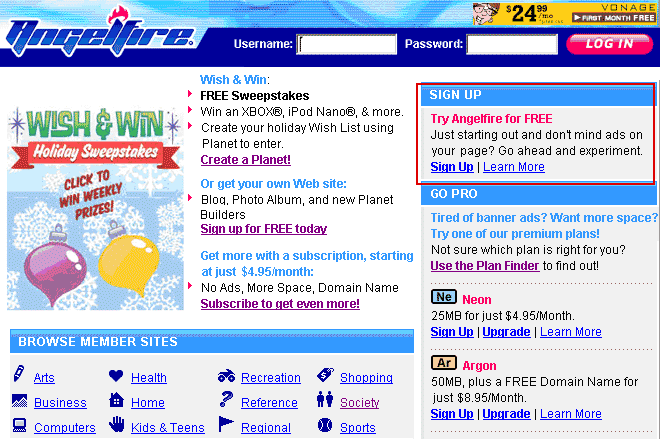
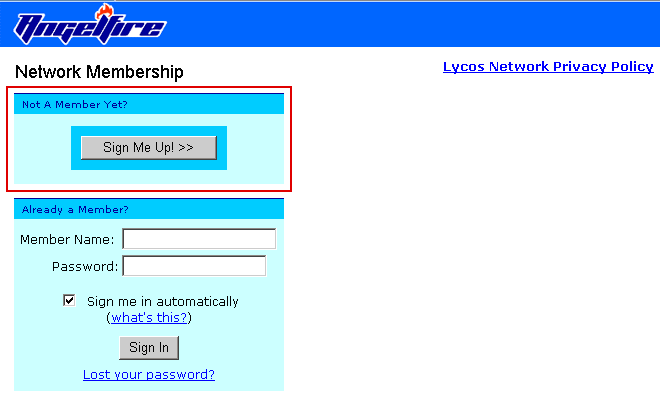
Sign up for a free Angelfire account to get started on your webpage. Go to Try Angelfire for FREE and click on the Sign Up link, which will lead you to another sign up page. Hit the Sign Me up! Button and fill in the application form.
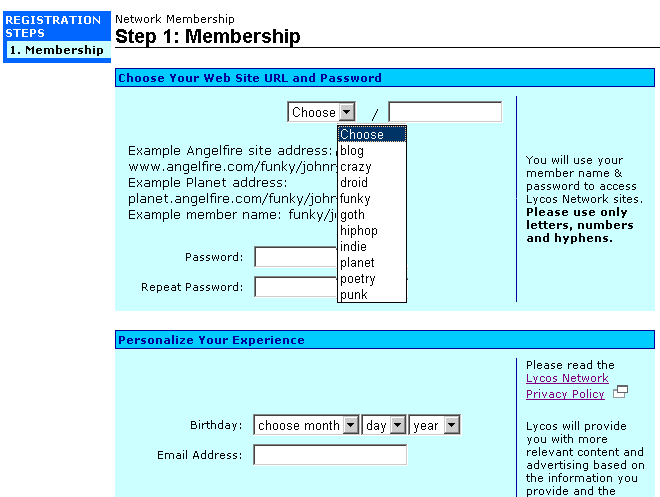
On the registration page, you are requested to choose a username for yourself, which will serve as your website address.
Angelfire.com Homepage
Angelfire.com sign up page
Member Registration Form
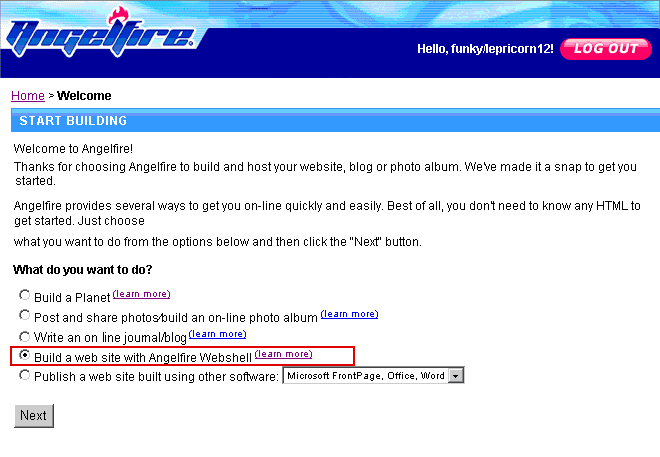
The Webshell is divided into 3 sections:
1 – File Management area
2 – File Upload area
3 – Transloader area
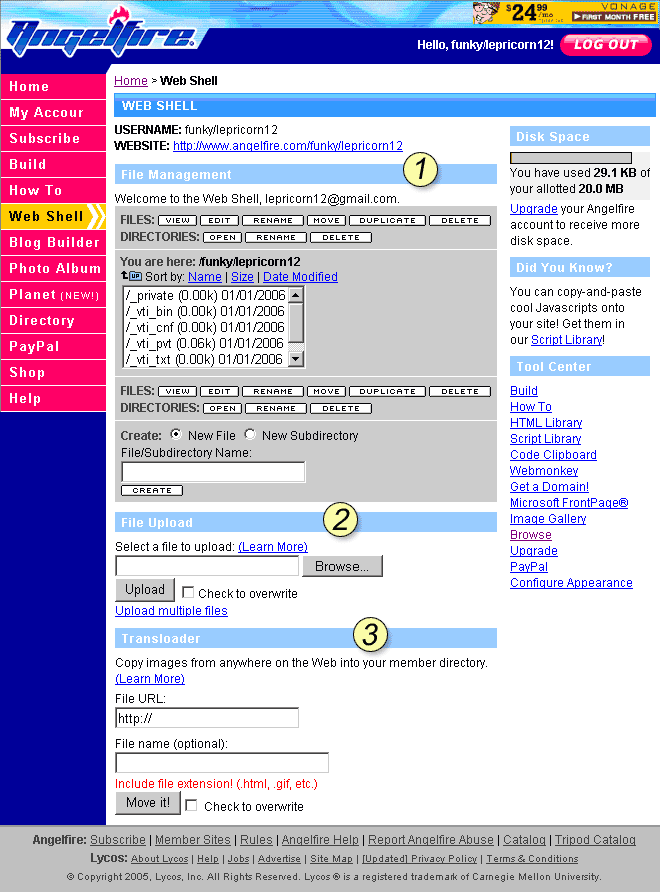
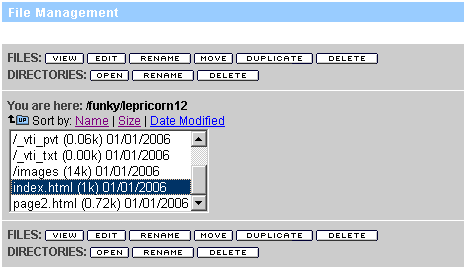
It is divided into 2 parts: Directories and Files. Directories are the folders where your files are stored. Files are items that make up your site, like HTML pages, images, music files, etc. A directory can contain many files. You will see a list of files that belong to your webpage. Angelfire creates some automatic files for you. An important file is index.html which is the main page of your website. You can create additional pages on your web site – we will elaborate on this later on.
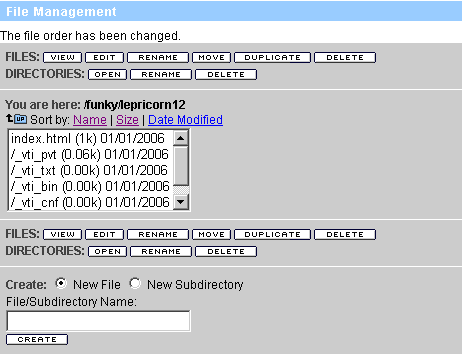
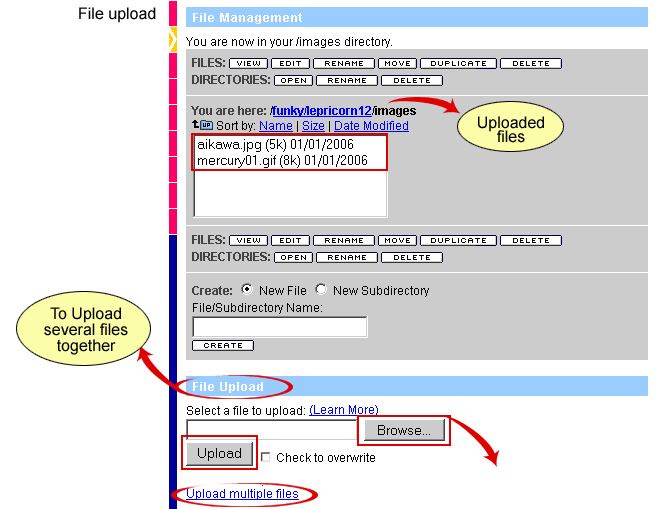
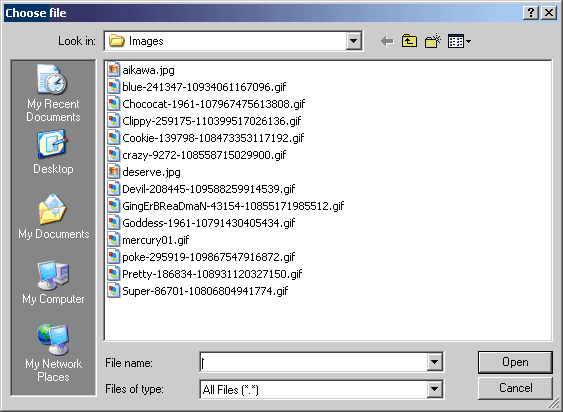
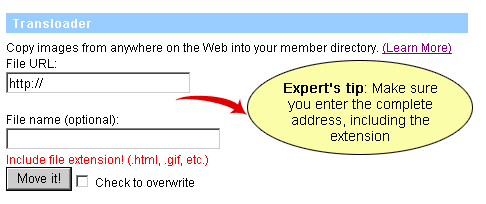
A few important pointers:
Opening the index.html file
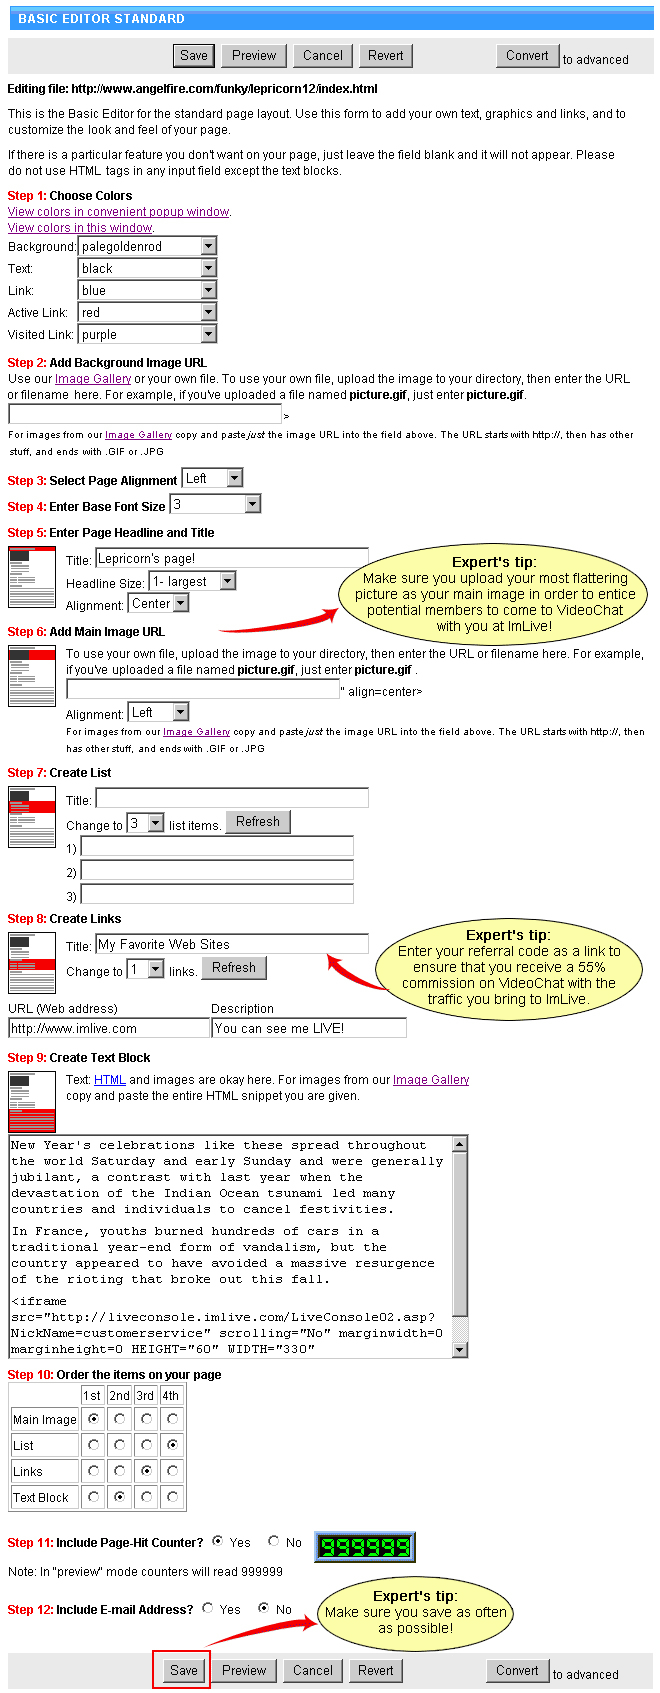
Basic Editor Standard
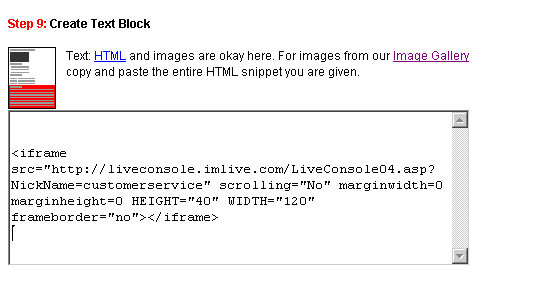
Adding the HTML code
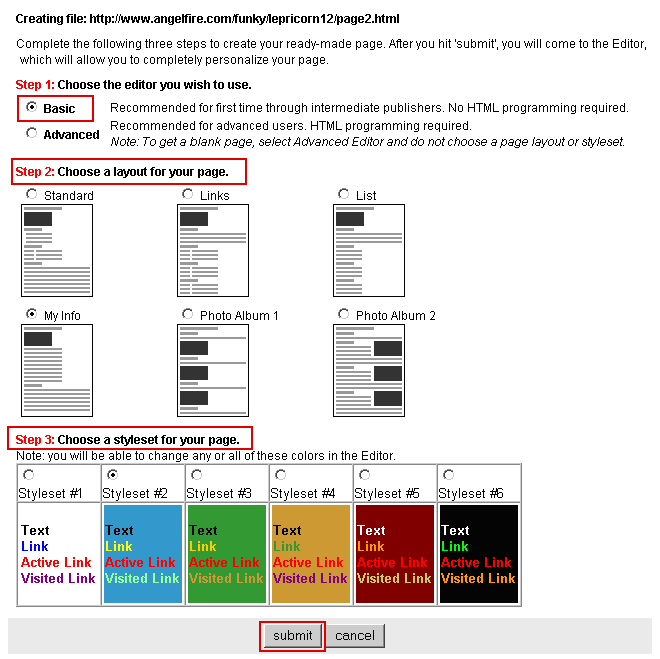
You will be sent immediately to Create A New Page. There you should choose the Basic editor, choose one of the Photo Album layouts, select the colors you desire and hit the Submit button. The Basic Editor screen will appear where you can customize your new page. Follow the steps listed in red and click Submit. If there is a particular feature you don’t want on your page, just leave the field blank and it will not appear.

Also, if your web page consists of several pages, you should link the pages together to make the navigation throughout your website convenient.

